Category Archives: Wood Working

A Storage Cubby for my Son’s Bedroom

One thing that seems to be a universal truth about having kids is that they come with a lot of stuff. That stuff needs to be stored somewhere, and so I found myself building a storage cubby for my son’s nursery.

As always, I started out by modelling the cabinet in Fusion 360. When I started wood working, I had a bad habit of building stuff that was too small. I’ve found that modelling my pieces in a CAD program like Fusion helps me get the proportions of the piece correct and forces me to think through the joinery. This way, I get a chance to fix problems with the design before I cutting a single piece of wood.

The carcass of the cabinet, made from 3/4″ baltic birch plywood

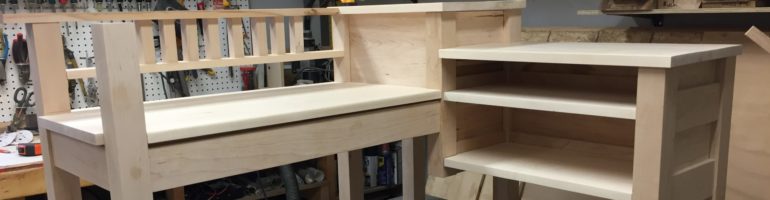
The cubby is sized to fit a set of cloth bins that we purchased on Amazon. The two bottom cubbies will accommodate taller cloth bins, the middle two cubbies can hold the shorter of the cloth bins, and the top shelf is designed to hold a row of children’s board books.

I built the cabinet carcass out of 3/4″ baltic birch plywood. This is the first time that I’ve used this product, and I have to say that it is a fantastic product. Expensive, and heavy as hell (it’s about all I can do to wrestle a 5′ x 5′ sheet of the stuff around my shop), but beautifully flat and smooth, and free of annoying voids.

Wherever two pieces of plywood meet at a right angle, I cut a dado at the table saw that is sized to accommodate the perpendicular piece of wood. This adds significant strength to the glue and screws that tie the pieces of the cabinet together. I made sure to countersink the screws so that I could hide screw holes, and cut a piece of 1/8″ plywood to form the back of the piece. The backing board sits into a rabbet, and is flush with the 3/4″ plywood that makes up the side of the cabinet.

Two oak boards, glued together to form the top of the cabinet

To top the cabinet, I glued together a couple of boards of red oak. I drilled holes for three dowels in each of the boards. The dowels help to orient the boards and ensure that the seam between them stays flat while the glue dries.

The top of the cabinet, sanded and finished with Osmo Polyx Oil

Once the glue dried, I removed the dried excess with a chisel and hand plane, gave cut the cabinet top to size, put an 1/8″ round over on the edges with a palm router, and sanded the entire thing down to 220 grit.

I used Osmo Polyx Oil as a finish. This product has become my go-to finish for hardwood projects over the last little while. It leaves a matte finish that is soft to the touch, and does not leave a plastic film or discolour the wood in the way that polyurethane does.

The cabinet carcass, pictured with the first two coats of white paint applied

Once the glue was dry on the cabinet, I cut some poplar strips and tacked them onto the front face of the cabinet to hide the edge of the plywood. Some wood filler was used to plug up the screw holes and tighten up the joinery on the face frame.

The cabinet was painted with three coats of a white latex paint. I tried to keep the coats thin and avoid drips. In between the first and second coats, I lightly sanded with 220 grit paper to remove as many brush strokes as possible. The result is a smooth, glossy finish. It isn’t quite as good as a spray finish, but for brush work, it’s not half bad.

The cabinet skirt, made from red oak, seen here prior to receiving routered edges

The last piece that needed to be built was the skirt of the cabinet, again made from red oak to match the top. The skirt consists of an inner frame that is glued and screwed together, as well as an outer frame that is glued on and sports decorative miter joints.

The cabinet skirt, sanded, routered, and finished with Osmo Polyx Oil

After the glue dried, I used my hand plane and palm sander to clean up the surface, and applied a decorative ogee profile to the upper edges. Finally, the piece was finished with a coat of the same Osmo Polyx Oil that I used on the cabinet top.

Later on in the process, I cut one of the long edges off of the skirt so that the cabinet can sit as close to the wall as possible. If I had been thinking at design time, I would have allowed the top of the cabinet to overhang the back so that it sits flush with the wall. As it stands, there’s a gap thanks to the baseboard in the nursery.

The finished cabinet, loaded with books and toys

Once the paint and finish dried, I connected all of the pieces with some #8 1-1/2″ screws. Because I expect that the oak will move with humidity while the plywood stays stable, I fed the screws through 1/4″ holes in one of the pieces so that there’s room for one piece to move without cracking.

The finished cabinet looks great in place in my son’s nursery, especially because it shares a colour scheme with the crib that I built when he was born. I’m really proud of this one.

Leave a Comment

Filed under Wood Working

Building a Crib for my Son

When my wife and I started trying to get pregnant, I began designing a crib for my child to be. My rationale was simple: my wife would be providing everything that our child needed over the course of the pregnancy, and aside from caring for her, there wasn’t much that I could do to help the process along. The crib was a project that would keep me occupied, and would provide the child with a safe place to sleep throughout the early stages of its life.

I set about designing the piece in Fusion 360, referencing two YouTube videos for inspiration and checking my work against the Canadian regulations regarding crib design.

I sized everything around a mattress that we purchased from Toys R’ Us. After modelling its dimensions in Fusion 360, I could build the rest of the piece around it.

The design that I came up with was a simple affair with pleasant curves and clean lines:

A render of the 3D model that I built in Fusion 360 before starting the project

Once happy with the design, it was time to purchase the rough stock that I would mill down into the individual pieces that make up the finished crib. I chose red oak for the skeleton of the crib and poplar for the parts that would be painted white.

The rough cut stock for the project, stacked up in my shop before milling began

The Headboard and Foot Board

Each end of the crib is composed of an oak frame that surrounds a floating poplar panel. Because the panel isn’t glued into the frame, the boards that make it up are free to shrink and expand with seasonal changes in humidity.

I cut a dado along the centre of each oak piece. The dado stretches the entire length of the shorter pieces that make up the top and bottom of the frame, but on the longer pieces that make up the sides of the frame, the dado is stopped so that you can’t see it from the outside.

The oak pieces that make up the frame of each end of the crib. Shorter top and bottom pieces are on the left, while longer side pieces are on the right.

I cut a tenon that was sized to fit into the dado on the end of each of the shorter pieces. This allowed the top and bottom of each frame to slot into the sides that make up the legs of the crib. With the joinery cut, I used my band saw to cut a gentle curve along the frame tops, and dry fit the pieces to check my work.

One end of the crib dry fit with clamps. The frame is rotated 90 degrees to the left and is sitting on its side. The panels that make up the centre of the piece have not yet been installed.

Next, I began work on the shiplap boards that make up the centre panel of each end of the crib. I made these pieces out of poplar, a cheaper hardwood that takes paint well. Each shiplap board was cut on the table saw in four passes: Two to form the rabbets on each side, followed by two more to add the chamfered edges.

This is a diagram of the end of a single shiplap board. Multiple boards can be laid side by side, with their overlapping pieces interlocking to form a panel.

With the shiplap boards cut, I could slot them into my dry fit frame to make sure that the joinery was nice and snug. I think that the shiplap adds a pleasant detail to the otherwise smooth face of the end of the crib.

Four of the shiplap boards that make up the middle of one end of the crib fit into place

The Sides

With the headboard and foot board complete, I turned my attention to the sides of the crib. Each side was comprised of two long horizontal oak stretchers spanned by 13 vertical poplar bars. I cut a tenon on the end of each bar, and a corresponding mortise into each stretcher. Since there’s no such thing as a square drill bit, I used a chisel to square up each of the 52 holes.

I lost track of the hours that I spent cutting all of the joinery for the long sides of the crib. While they were certainly less complicated than the ends, the joinery was far more time consuming.
One side of the crib dry fit together after all of the chiselling was completed

The Mattress Support

The final component of the build was the platform that supports the mattress. It’s a simple oak frame with a 3/4″ slab of MDF that sits inside of it.

This frame is really heavy. It turns out that Medium Density Fibreboard is super dense stuff. I’d hate to have to move a sheet of 3/4″ High Density Fibreboard!

My wife and I wanted the crib to be adjustable, with a high position that would be used until our child could sit up, and a low position that would be used thereafter.

When I built the mattress support frame, I opted to strengthen the joinery with wood screws, thinking that they would be hidden by the bottom stretcher of each side of the crib when it was assembled. Unfortunately, I neglected to think about where the frame would sit when in the high position, leaving the screws visible in the final build. Ideally, I would have built the frame the other way round, with the short ends overlapping the long ones so that the screws would always be hidden regardless of the height of the frame.

Dry Fitting the Pieces

To affix all of the pieces of the crib to one another, I opted to use threaded brass inserts and countersunk brass screws. This construction means that I can take the entire crib to pieces with nothing but a large flat head screwdriver, making it relatively easy to transport and to store once our child has outgrown it.

In a previous post, I wrote about the technique that I learned for driving the threaded brass inserts home. Even after I figured that out, accurately positioning the inserts so that they lined up with the holes that I drilled in the corresponding piece remained a huge challenge. I spent a lot of time locating and tuning these holes so that everything would line up at assembly time.

The first assembly of the crib with fasteners in place. None of the pieces have been glued together just yet, so the clamps are holding the headboard and foot board together.

While building the crib, I was also renovating the room that would become our child’s nursery. This turned out to be an equally big job that deserves its own post. Suffice it to say that I bit off more than I could chew, and didn’t manage to get all of the major components of the crib dry fit together until the day before our son was born. Thankfully, friends of ours gave us a bassinet that he slept in until I was able to finish the project.

Finish and Paint

Because of the way that the naturally finished oak and the painted poplar pieces were arranged in this build, I opted to wait until finishing was complete before gluing and of the parts together.

I used my trim router to add a 1/8″ round over to all of the parts that little fingers might be able to touch, and then sanded all of the pieces to 220 grit. Next, all of the poplar pieces were laid out on sawhorses and painted white.

The bars of the crib between coats from a rattle can

My goal was to end up with a smooth paint job, reminiscent of something that you might buy commercially. I started off using spray paint, repeatedly applying thin coats and lightly sanding between each. Although this technique worked, it seemed quite wasteful, so I switched to brushing paint on when it came time to do the shiplap. I still tried to keep my coats thin and sanded between each. Ultimately, I ended up with a smooth, almost plastic finish on all of the white painted pieces.

Once the white paint was dry, I glued everything together, and then set about finishing the oak. For this project, I opted to try Osmo Polyx-Oil satin finish. I started out applying it with a paint brush, but wasn’t happy with the number of drips and sags that I was getting, so I switched to applying it with a rag, rubbing it into the wood in the same way that you might apply furniture wax. This ensured a smooth, even coat, and left the oak feeling natural to the touch.

The two long sides of the crib with a wet coat of Osmo Polyx-Oil on the oak stretchers

Installation

By the time the crib was finally ready to be moved into our son’s room, it was the first week of November, nearly two and a half months after he was born.

Assembling the crib in my son’s nursery

Thanks to the threaded inserts and brass screws, installation was a snap. The finished crib is really heavy, and requires two people to move, so it’s a good thing that it can be easily taken to pieces.

The finished piece looks great in the corner of my son’s room. It’s far and away the nicest piece of furniture that I’ve built to date, and the fact that it was built with love for my son makes it all that much better.

Our boy trying out his new bed for the very first time ❤️

1 Comment

Filed under Wood Working

How to Install Brass Threaded Inserts

I’m currently working on building a crib for my firstborn son. There are two elements of this design that make it unique among the furniture that I’ve created in the past:

  1. The mattress should have two distinct heights: an upper height for when he is an infant, and a lower height for when he is a toddler
  2. I need to be able to disassemble the piece; both to move it into the nursery, and for storage once my son has outgrown it

I opted to solve both of these problems by building the crib out of five flat pieces that are affixed to one another using 3/8” brass screws and threaded inserts. I chose brass here for its aesthetics, thinking that the brightness of the brass would play nicely against the warmth of the wood.

The product that I chose for this purpose was E-Z Lok 3/8”-16 threaded brass inserts:

The kit comes with some the threaded inserts, and appropriately sized drill bit, and a slot head driver that is supposed to allow you to drive the threaded inserts home using a drill. Separately, I purchased some slot head brass screws that thread into these inserts from McMaster Carr.

When choosing these fasteners, I made the mistake of assuming that both the screws and threaded inserts needed to be made out of brass brass.

In practice, the threaded inserts are never visible when the crib is assembled, so I could easily have used a threaded insert that was made out of steel, which would have handily avoided all of the problems that I encountered when trying to drive the relatively soft brass inserts into the hard oak of the crib body.

On the right, a virgin threaded insert. To the left, a threaded insert that was destroyed when I tried to drive it into the end grain of a piece of oak using the tool included in the kit

After a few of the brass inserts tore themselves to pieces during my early testing (which I thankfully conducted on scrap, and not on my finished piece), I turned to Reddit to ask the community of r/woodworking for help installing these fasteners.

The solution came from user u/okacookie who suggested that I thread a nut most of the way onto a 3/8”-16 hex head bolt, and then thread the bolt into the threaded insert, jamming the threaded insert up against the nut. This way, a hex driver or ratchet can be used to drive the threaded insert into the oak workpiece without having to rely on the flimsy slot head that has a tendency to rip to if you so much as look at it the wrong way. Once the threaded insert has been driven home, the bolt can be backed out, leaving the insert behind.

In practice, I found that starting the threaded insert with the slot driver that was included in the E-Z Lok kit before switching out to the jam nut and ratchet combination worked best for me.

In closing, if you find yourself using these brass threaded inserts, first ask yourself if they absolutely have to be made from brass. If not, use a stronger metal. If so, ditch the silly slot head driver and use a bolt with a jam nut to get the job done.

1 Comment

Filed under Product Review, Wood Working

Classy Walnut Monitor Risers

In this video, I show you how to make some great looking walnut monitor risers that feature continuous grain up one leg, across the top, and down the other leg, as well as hard maple splines that strengthen the miter joints between leg and top.

Monitor risers are a really simple project that anybody can make to add a little class and a personal touch to an otherwise drab workspace. If you make some of your own, please share them in the comments below, or on social media.

Leave a Comment

Filed under Wood Working

DIY Christmas Tree Ornaments

In this video, I show you how to use up all of those hard wood scraps that are cluttering up your shop, repurposing them into some cute Christmas tree ornaments shaped like five pointed stars.

Leave a Comment

Filed under Wood Working

How to Make Harry Potter’s Nimbus 2000

In this video, I tackle my very first prop replica project, recreating Harry Potter’s Nimbus 2000 (before it got whomped by a willow) from Harry Potter and the Philosopher’s Stone. As a source, I used pictures of the replica that a company called CineReplica used to distribute.

My broom is made from red oak (it’s about a third of the cost of mahogany), and is scaled to 5′ (152cm), based on some stills from the first Harry Potter film. My build omits the foot pegs that are shown in the films, since they aren’t mentioned in the books, and I think that the broom looks better without them.

Leave a Comment

Filed under Art, Wood Working

How to Make a Chisel Cabinet

I made this chisel cabinet out of some old barn board that I had kicking around the shop. It hangs on my wall, and gives me a space to store my mortising chisels, marking knife, and engineer’s square. Each of the tools is affixed within the box with a neodymium magnet that keeps it from falling out or knocking against the other tools. The cabinet has two doors that are held closed with a hard drive magnet, and I engraved the doors using my desktop CNC machine.

Leave a Comment

Filed under Wood Working

How to Make a Live Edge Bench with Hairpin Legs

Here’s a simple project that anybody can do – an oak live edge bench with black hairpin legs. The materials are reasonably priced, and it only requires the most basic tools to complete, so grab a saw, get to sanding, and put some polyeurethane on it!

Leave a Comment

Filed under Wood Working

Derek’s End Tables

My buddy Derek needed some new end tables for his man cave. We sourced some African hardwood called Black Limba and built two beautiful tables to fit the spot that he had in mind. The wood is absolutely gorgeous, and really pops with a couple of coats of polyurethane on it.

Leave a Comment

Filed under Wood Working

How to Make Plywood Tool Stands

These basic tool stands are really easy to build, and make it easy to move heavy, formerly stationary tools around my workshop. I’ve got a small space, so the fact that they add to my organization options is also really helpful. They’re made out of 2x4s, 1/2″ plywood, 3/4″ plywood, and some cheap casters. The entire project cost around $100 for both. These are a great project for somebody just starting to build out their workshop.

Leave a Comment

Filed under Wood Working