Monthly Archives: January 2021

Building a Crib for my Son

When my wife and I started trying to get pregnant, I began designing a crib for my child to be. My rationale was simple: my wife would be providing everything that our child needed over the course of the pregnancy, and aside from caring for her, there wasn’t much that I could do to help the process along. The crib was a project that would keep me occupied, and would provide the child with a safe place to sleep throughout the early stages of its life.

I set about designing the piece in Fusion 360, referencing two YouTube videos for inspiration and checking my work against the Canadian regulations regarding crib design.

I sized everything around a mattress that we purchased from Toys R’ Us. After modelling its dimensions in Fusion 360, I could build the rest of the piece around it.

The design that I came up with was a simple affair with pleasant curves and clean lines:

A render of the 3D model that I built in Fusion 360 before starting the project

Once happy with the design, it was time to purchase the rough stock that I would mill down into the individual pieces that make up the finished crib. I chose red oak for the skeleton of the crib and poplar for the parts that would be painted white.

The rough cut stock for the project, stacked up in my shop before milling began

The Headboard and Foot Board

Each end of the crib is composed of an oak frame that surrounds a floating poplar panel. Because the panel isn’t glued into the frame, the boards that make it up are free to shrink and expand with seasonal changes in humidity.

I cut a dado along the centre of each oak piece. The dado stretches the entire length of the shorter pieces that make up the top and bottom of the frame, but on the longer pieces that make up the sides of the frame, the dado is stopped so that you can’t see it from the outside.

The oak pieces that make up the frame of each end of the crib. Shorter top and bottom pieces are on the left, while longer side pieces are on the right.

I cut a tenon that was sized to fit into the dado on the end of each of the shorter pieces. This allowed the top and bottom of each frame to slot into the sides that make up the legs of the crib. With the joinery cut, I used my band saw to cut a gentle curve along the frame tops, and dry fit the pieces to check my work.

One end of the crib dry fit with clamps. The frame is rotated 90 degrees to the left and is sitting on its side. The panels that make up the centre of the piece have not yet been installed.

Next, I began work on the shiplap boards that make up the centre panel of each end of the crib. I made these pieces out of poplar, a cheaper hardwood that takes paint well. Each shiplap board was cut on the table saw in four passes: Two to form the rabbets on each side, followed by two more to add the chamfered edges.

This is a diagram of the end of a single shiplap board. Multiple boards can be laid side by side, with their overlapping pieces interlocking to form a panel.

With the shiplap boards cut, I could slot them into my dry fit frame to make sure that the joinery was nice and snug. I think that the shiplap adds a pleasant detail to the otherwise smooth face of the end of the crib.

Four of the shiplap boards that make up the middle of one end of the crib fit into place

The Sides

With the headboard and foot board complete, I turned my attention to the sides of the crib. Each side was comprised of two long horizontal oak stretchers spanned by 13 vertical poplar bars. I cut a tenon on the end of each bar, and a corresponding mortise into each stretcher. Since there’s no such thing as a square drill bit, I used a chisel to square up each of the 52 holes.

I lost track of the hours that I spent cutting all of the joinery for the long sides of the crib. While they were certainly less complicated than the ends, the joinery was far more time consuming.
One side of the crib dry fit together after all of the chiselling was completed

The Mattress Support

The final component of the build was the platform that supports the mattress. It’s a simple oak frame with a 3/4″ slab of MDF that sits inside of it.

This frame is really heavy. It turns out that Medium Density Fibreboard is super dense stuff. I’d hate to have to move a sheet of 3/4″ High Density Fibreboard!

My wife and I wanted the crib to be adjustable, with a high position that would be used until our child could sit up, and a low position that would be used thereafter.

When I built the mattress support frame, I opted to strengthen the joinery with wood screws, thinking that they would be hidden by the bottom stretcher of each side of the crib when it was assembled. Unfortunately, I neglected to think about where the frame would sit when in the high position, leaving the screws visible in the final build. Ideally, I would have built the frame the other way round, with the short ends overlapping the long ones so that the screws would always be hidden regardless of the height of the frame.

Dry Fitting the Pieces

To affix all of the pieces of the crib to one another, I opted to use threaded brass inserts and countersunk brass screws. This construction means that I can take the entire crib to pieces with nothing but a large flat head screwdriver, making it relatively easy to transport and to store once our child has outgrown it.

In a previous post, I wrote about the technique that I learned for driving the threaded brass inserts home. Even after I figured that out, accurately positioning the inserts so that they lined up with the holes that I drilled in the corresponding piece remained a huge challenge. I spent a lot of time locating and tuning these holes so that everything would line up at assembly time.

The first assembly of the crib with fasteners in place. None of the pieces have been glued together just yet, so the clamps are holding the headboard and foot board together.

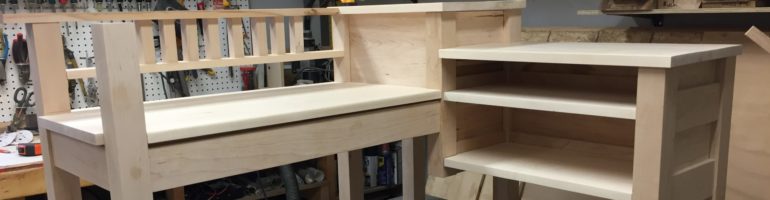
While building the crib, I was also renovating the room that would become our child’s nursery. This turned out to be an equally big job that deserves its own post. Suffice it to say that I bit off more than I could chew, and didn’t manage to get all of the major components of the crib dry fit together until the day before our son was born. Thankfully, friends of ours gave us a bassinet that he slept in until I was able to finish the project.

Finish and Paint

Because of the way that the naturally finished oak and the painted poplar pieces were arranged in this build, I opted to wait until finishing was complete before gluing and of the parts together.

I used my trim router to add a 1/8″ round over to all of the parts that little fingers might be able to touch, and then sanded all of the pieces to 220 grit. Next, all of the poplar pieces were laid out on sawhorses and painted white.

The bars of the crib between coats from a rattle can

My goal was to end up with a smooth paint job, reminiscent of something that you might buy commercially. I started off using spray paint, repeatedly applying thin coats and lightly sanding between each. Although this technique worked, it seemed quite wasteful, so I switched to brushing paint on when it came time to do the shiplap. I still tried to keep my coats thin and sanded between each. Ultimately, I ended up with a smooth, almost plastic finish on all of the white painted pieces.

Once the white paint was dry, I glued everything together, and then set about finishing the oak. For this project, I opted to try Osmo Polyx-Oil satin finish. I started out applying it with a paint brush, but wasn’t happy with the number of drips and sags that I was getting, so I switched to applying it with a rag, rubbing it into the wood in the same way that you might apply furniture wax. This ensured a smooth, even coat, and left the oak feeling natural to the touch.

The two long sides of the crib with a wet coat of Osmo Polyx-Oil on the oak stretchers

Installation

By the time the crib was finally ready to be moved into our son’s room, it was the first week of November, nearly two and a half months after he was born.

Assembling the crib in my son’s nursery

Thanks to the threaded inserts and brass screws, installation was a snap. The finished crib is really heavy, and requires two people to move, so it’s a good thing that it can be easily taken to pieces.

The finished piece looks great in the corner of my son’s room. It’s far and away the nicest piece of furniture that I’ve built to date, and the fact that it was built with love for my son makes it all that much better.

Our boy trying out his new bed for the very first time ❤️

1 Comment

Filed under Wood Working

Photo Organization Part 1: Importing Existing Files

Over the years, my wife and I have accumulated a large volume of digital photos. Nary a vacation has gone by that didn’t result in 1000+ photos of every landmark, vista, and museum artifact that we discovered during our travels.

As it turns out, the Continental Hotel from John Wick is actually a sushi bar

Unfortunately, the majority of these photos have ended up haphazardly organized in various folders on my media server, all with different directory structures and naming methodologies, which makes it difficult to lay my hands on a particular photo from some time in the past.

One of the projects that I’ve decided to tackle this year is to come up with some method by which to rein in this madness and restore some semblance of order to the realm.

I’m not sure exactly what tools or processes I will use to tackle this problem, but I figure that the best way to start is to split it up into smaller, more manageable sub-problems.

This, then, is the first in what I hope to be a series of posts about organizing my family photo collection. Subsequent posts will (hopefully) deal with a pipeline for importing new photos, establishing a reliable offsite backup solution, and maybe even experimenting with some deep learning to automatically tag photos that contain recognizable faces.

Why not use [Insert Cloud Service Here]?

“But,” I hear you protest in an exasperated tone of voice, “you could just upload all of your photos to Google Photos and let The Cloud solve this problem for you.”

While it’s true that there are a number of cloud providers that offer reasonably-priced storage solutions, and that some of them even use the metadata in your photos to impose some kind of organization solution, I have a few concerns with these products:

  1. They cost money: Nothing in life is free, at least not if you have more than a few gigabytes of it. The largest of my photo folders contains around 70GB of files, and with the recent arrival of our son, we take new photos at a heretofore unimaginable clip. I already have a media server, and storage on it is effectively free.
  2. My metadata isn’t complete/correct: Garbage in, garbage out, as they say. Most (all?) of the cloud storage solutions that I’ve seen that purport to organize your photos will do a messy job of the task if the metadata on your photos is incorrect or missing. Any tool that I use will need to correct for this problem.
  3. Google is a creep: The same is true of Facebook et al. I’d rather generate less digital data for the multinational companies that control our modern world to indiscriminately slurp up and process in hopes of getting me to click on a single ad, thank you very much. Doubly so if the storage provider in question is going to use facial recognition to tie a name to faces in my photos, especially photos of my son.

Organizing Files with Elodie

My initial inclination, when considering the problem of sorting many gigabytes of photos into a reasonably logical folder structure was to write a script that would read the EXIF data out of the file, interpret it, and use it to determine where the file belongs.

But the decrepit fire station from Ghostbusters? Actually a fire station.

In one of the better decisions that I’ve made so far this year (hey, it’s only January), I decided to take a look around GitHub to see if somebody had already written a script to do this work, and man, am I glad that I did.

As with most things that seem simple, it turns out that the task of reading EXIF data can get really complicated in a hurry. There are a bunch of different historical format differences, every camera manufacturer implements some number of custom extensions to the format, etc.

Enter Elodie

Elodie is a cutely-named tool with an even cuter mascot that uses exiftool to read the metadata out of your photos, and then sorts them into a configurable folder structure based on that data. If your camera or phone wrote GPS coordinates indicating where the photo was taken, Elodie can even query the MapQuest API to translate those coordinates into a human-readable place name that is added to the directory structure.

The documentation is comprehensive, albeit brief, but I’ll include a handful of the commands that I used in this post just to demonstrate the workflow that I ended up with.

There are basically two major operations in Elodie: import and update. The former is used to move pictures from some source directory into the target directory, reading their metadata, renaming them, and organizing them within a configurable directory structure along the way. The latter, meanwhile, is essentially used to correct mistakes that were made during the import process. It lets you correct the date, location, or album metadata for previously imported files, and appropriately re-sorts them into the directory hierarchy.

The command for importing existing files into your collection is simple:

~/elodie $ ./elodie.py import --trash --album-from-folder --destination=/mnt/media/Pictures/ /mnt/media/Pictures.old/Montreal\  Trip/

In this case, I’m importing vacation photos from /mnt/media/Pictures.old/Montreal Trip. The destination folder is /mnt/media/Pictures, and I’m using the --album-from-folder option to tell Elodie that I want it to keep all of the pictures in this batch together in a folder called Montreal Trip in the destination directory. We went on this trip in September of 2010, so the resulting folder structure looks like this:

mnt/
├─ media/
│  ├─ Pictures/
│  │  ├─ 2010/
│  │  │  ├─ September/
│  │  │  │  ├─ Montreal Trip/
│  │  │  │  │  ├─ 2010-09-08_19-29-44-dsc00279.jpg
│  │  │  │  │  ├─ 2010-09-09_20-15-44-dsc00346.jpg
│  │  │  │  │  ├─ ...

There may be other pictures that were taken in September of 2010 in the September folder, but they won’t be sorted into the Montreal Trip folder unless they are marked as being a part of the Montreal Trip album.

It should be noted at this point that Elodie goes to great lengths to avoid maintaining a database of imported files. Instead, it reads metadata from and writes metadata to the image files that it is organizing. This ensures that the resulting directory structure is as cross-platform and broadly compatible as possible without locking your photo collection into a proprietary file format.

The Men in Black Headquarters at 504 Battery Drive

Elodie does offer one database-lite feature that helps to detect bit rot: The generate-db operation records a cryptographic hash of every photo in your collection into a file. Months or years down the road, you can check if any of the files in your collection have become corrupted by running the verify operation. This will recompute the hashes of all of the files in your collection, compare them against the previously recorded values, and let you know if anything has changed.

One place where not having a database falls short is if a small handful of images within a directory that contains hundreds or thousands of vacation photos have incorrect or missing EXIF data. In this case, it’s possible for those photos to be written to the wrong place in the target directory structure, and if you don’t catch the problem during the import, you’re not likely to find and fix the mistake. If Elodie were to maintain a database that tracked the source and destination locations for every imported photo, these mistakes would be easy to find. This in turn means that importing a large existing photo collection with Elodie becomes a job that requires human supervision.

Here’s a brief rundown of some of the issues that I ran into while importing a large collection of existing files:

  • Missing metadata: Some photos, particularly those taken by pre-smartphone cameras, didn’t have the date on which the photo was taken in their EXIF data. When it encounters this problem, Elodie falls back to the lesser of the file created or file updated date. Because of the way that I managed my import, all of these files ended up in Pictures/2021/January/Unknown Location/, but if you didn’t accidentally overwrite the file created date on all of your photos as a part of your import process, Elodie may put them into an unexpected location in your target directory tree.

    If you happen to be importing an album (i.e. a bunch of photos that were taken as a part of a named event) and your target directory structure includes the album name, you can find the improperly organized photos by running find /path/to/photos -type d "album name" -print to find directories in your collection that have the same name as the album. Once found, you can use Elodie’s update operation to fix the problem:
    ~/elodie $ ./elodie.py /update --time="2014-10-22" --album="album name" /path/to/photos
  • Incorrect metadata: In many ways, incorrect metadata is worse than missing metadata, because it causes photos to be organized into unexpected locations. As far as I can tell, the cause of this problem was a pre-smartphone camera that had its date and time set incorrectly. Remember when you used to have to set the date and time on all of your electronics? Boy, that sucked.

    You’ll know this is the problem if you are importing photos from a vacation that you took in 2012, but they’re inexplicably being put into the 2008 directory. In this case, you can use exiftool, the underlying library that Elodie uses to read and write metadata, to add or subtract some number of years, months, days, or hours to or from the dates recorded in the photos’ EXIF data.
  • Geotag lookup doesn’t appear to work: As mentioned above, Elodie has the ability to convert GPS coordinates found in the EXIF data of photos into human-readable place names by way of a call to the MapQuest API. This, of course, only works if your camera was aware of its location at the time that the photo was taken, which wasn’t really a thing in the pre-smartphone era.

    This isn’t really a problem for vacations, as I can import all photos from a trip into an album, and that album name will be used in the folder structure that Elodie creates. For example, if you import photos from a folder called Egypt using the --album-from-folder option, they’ll end up in a directory structure like this: 2012/March/Egypt/.

    It does, however, get annoying for photos that were taken closer to home with a non-GPS-aware camera. These all get sorted into a year/month/Unknown Location/ directory. I can’t find anything in the Elodie docs or source code that allows this behaviour to be changed. I would rather that these photos end up in the root of the year/month/ folder, because I think that the extra Unknown Location directory is, well, less than helpful, but I recognize that this is a matter of preference. For now, I think I’ll solve this problem by writing a quick script to move these photos as I see fit.

What’s next?

Even with the help of a tool like Elodie, reorganizing tens of gigabytes worth of photos is not a quick task. I can hear the fans on my Drobo humming, and am only too aware that this kind of mass file migration is a great way to find the breaking point of old hard drives.

This isn’t from a movie. It’s just a cool shot looking North from the top of the Freedom Tower

Once I’m done importing all of the pictures that I already have, I’ll move on to figuring out an import pipeline for photos that I haven’t yet taken. Off the top of my head, it needs to be mostly automatic, work well with the iPhones that my wife and I use to take most photos these days, and should ideally email me the Elodie log so that I can see what photos ended up where and whether or not I need to manually correct any mistakes.

I’m hopeful that once I get around to importing photos that were taken with a smartphone that has internet time and some notion of its location, the metadata problems that I catalogued above will become the exception instead of the rule.

Once I figure out that next step, I’ll write about it here. In the meantime, go organize all of those photos that are cluttering up your media server. You’ll feel better once you do. I promise.

Leave a Comment

Filed under Software