Monthly Archives: July 2016

Cupboards for my Workshop

Since my shop is only about 17’x11′, it can get a bit cozy at the best of times. As I’ve continued to work in it, I’ve realized that having a decent storage system and constantly cleaning up as I work are key to maintaining a safe and productive environment. So instead of tidying up my space, I decided to build some cupboards to enhance my storage game. After all, what’s the point of tidying if I don’t have anywhere to put all of my shit?

I started off with a 4×4 sheet of 1/2″ GIS plywood that was left over from building my workbench.

2016-05-08 11.07.12

Using the table saw, I sliced the plywood into four one foot wide by four foot long strips. These would become the long sides of my cupboard boxes, which in turn meant that my cupboards would have a depth of about one foot.

2016-05-08 11.18.41

On each strip, I marked out three dados – one on each end, to accept the end caps of the cupboards, and another in the middle, where a divider would split the box into two compartments, each two feet wide.

2016-05-08 11.24.55
I cut the dados on my tablesaw, using a box joint set that makes perfect 1/2″ dados with flat bottoms. For the dados on the ends of the long strips, I set up a sacrificial fence so that the blade didn’t come into contact with my actual fence, which is made of metal, and eats sawblades for snacktime.

2016-05-08 11.52.28

These are the finished sides of the cupboards. That line down the middle does not go all the way through the pieces.

2016-05-08 12.06.46

Next, I cut the end caps for my cupboards. I needed six – one for each end of the two long boxes, and two more to split those boxes into two compartments. I made my end caps 12″ deep to match the width of the long pieces, and about 16″ tall, as that’s the height of the space where I want to hang my cupboards. This means that the final product will be two large cupboards, split into four 24″x16″ compartments.

2016-05-08 12.20.06

With the end caps cut, I could assemble the large boxes. I glued the end caps into the dados that had been cut into the longer pieces, tacked everything together with my brad nailer, and then put it all in clamps to dry.

2016-05-08 12.47.15

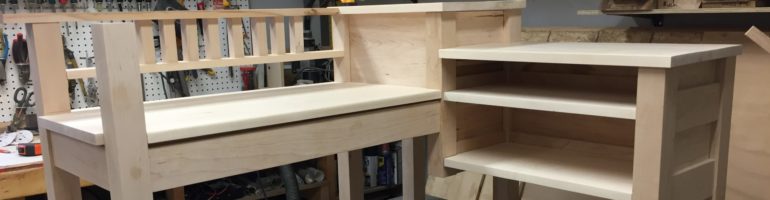
At this point, my 11’x17′ shop had two 2’x4′ boxes taking up most of the useable floor space in it. I found myself moving the boxes constantly to keep them out of the way while I continued to work.

2016-05-08 12.56.51

Once the glue was dry, I cut some thin clear pine strips and tacked them around the front edges of each box, giving them a nice veneer that hid the edges of the plywood. While it’s easy to work with, and was cheap scrap left over from a previous project, the pine was actually too soft for this application. I fully expect it to be dented and scratched and chipped after a few years of hard use. In retrospect, something harder would have made more sense for this application, as the fronts of the cupboards will get a lot of abuse.

2016-05-08 14.04.25

Here’s a shot of both boxes with the face trim complete

2016-06-13 13.35.26

With the cupboard boxes functionally complete, it was time to start on cupboard doors. This was actually the real challenge of the project, since making the boxes consisted of scaling up techniques that I’ve already learned.

I started by cutting the outer frame pieces from some more clear pine, again left over from a previous project. I cut everything just a bit long, and was careful to avoid knots that might lead to trouble down the line. Once the pieces were planed and jointed, it was easy to see how they’d fit together.

2016-06-13 14.08.51

I wanted to make rail and stile doors, which consist of an outer frame and a floating inner sheet of plywood, so the first step was to cut a dado on the inside of each of the rails and stiles that would accept the plywood that makes up the majority of the door surface.

The dado is 1/4″ wide, and was cut with a couple of passes across my standard table saw blade. The key to this technique is to flip the piece end over end with every pass, keeping the cut centred while slowly edging the fence out from the blade, sneaking up on a dado width that snugly accepts the plywood centre. Once I found that width, I left the fence in place, and used it to cut all of the other dados to the same width.

2016-06-13 14.51.57

Because my saw blade isn’t 1/4″ wide, this approach left me with a bunch of garbage material down the centre of my dado. Once the width was determined, I could move the fence and take another pass to hog this material out. The finished dado fit snugly onto the plywood that would form the inside of my doors.

2016-06-13 14.45.28

With the dados cut, I fashioned a tongue on the ends of each rail (the 16″ vertical edges of the cupboard doors). The first step was to figure out the length of each rail. I laid the stiles out on my cupboard boxes, set the rails on top, and worked out the final length of each rail, taking into account the fact that I was going to cut a tongue onto the end of the rail to fit into the dado on the stile.

2016-06-13 15.01.23

The next step was to slice off the outer edges of the piece in a series of passes perpendicular to the table saw blade, leaving a tongue the width of the dado exposed. Because the tongue is the same width as the dado, it will butt into the dado on the accepting piece, creating a tight joint.

2016-06-13 15.43.51

With the tongues and grooves cut to size, the doors could be dry fit together to test my cuts.

2016-06-13 16.05.52

Once I was sure that everything was the right size, I glued each cupboard together. It’s important to note here that the plywood in the centre of the frame is floating. It is not glued into the frame, because it’s meant to leave space for the materials to expand and contract with the weather, without cracking the door.

2016-06-13 16.30.02

Once the glue dried on the doors, I gave everything a thorough sanding and test fit my hinges. These are european-style hinges that allow the cupboards to open to 90 degrees, with the doors entirely perpendicular to the boxes. In this shot, the cupboards are upside-down. When hanging on the wall, the door will open upward, toward the ceiling.

2016-07-03 14.42.50

Once I was sure that everything would fit, I removed the hardware and masked the pieces off for painting.

2016-07-03 16.08.58

The cupboard boxes were painted the same grey as the walls of the shop, and the face trim was painted white. I used an alkalyde paint that I had left over from painting the trim on the outside of the garage. It’s meant to harden with a tough shell that resists damage, so my hope is that it will help the cupboards stand up to the abuse that they’re sure to receive in the shop.

2016-07-10 10.44.53

The cupboard doors got the same white paint job as the trim. My 12′ work bench comes in really handy when painting 8′ of cupboard doors.

2016-07-10 10.44.45

After letting the paint cure for a couple of days, I hanged the cupboard boxes on the wall above my work bench, screwing scraps of 2×4 into the studs in the wall, and affixing the cupboards to those scraps with 1 1/2″ wood screws. This probably isn’t the strongest way to hang cupboards, but it seems to be holding up ok, so here’s hoping that it doesn’t all come crashing down on me sometime soon.

2016-07-10 12.40.54

Finally, I re-attached the hinges, and added some cheap friction slides that help the doors to stay open in their eternal struggle with gravity.

2016-07-17 12.01.27-1

Look at all the space that I have on my workbench now that my shit is packed away into cupboards! I still need to do some organizing, especially in the left-most compartment, but it’s a start.

2016-07-17 12.02.06 HDR-2

This project has been a long time in the works. There were a lot of stops and starts and distractions, so it took me four or five weeks to get them done. If I worked straight through, I suspect that I could have finished them in two hard weekends of work with no problem.

All in all, I’m really happy with how they turned out, and my experiment with rail and stile cupboard doors was a success. I’ll have to use that joint again, perhaps for some cheap picture frames, or maybe a box with slats for sides.

2 Comments

Filed under Wood Working

Image Rotation and EXIF Data

If you’ve looked at some of my earlier posts in Firefox, you may have noticed something odd about them. Some of the photos will appear to be rotated in the wrong direction, but if you view the same post in Chrome or on an iPhone, they’ll appear to be rotated correctly.

When I’m working in my garage, I take all of my photos on my iPhone, and I’ve recently found out that when I take a picture in landscape orientation (with the home button held to the left or the right, rather than the top or bottom of the screen), iOS doesn’t rotate images to match the orientation of the phone when it writes them to storage. Instead, it writes the image data in the same orientation as the camera, and saves some time by writing the orientation information separately into the metadata that it attaches to the image. This lets the device take pictures faster, but means that some of the images have to be rotated before I post them.

Unfortunately, I didn’t notice this behaviour up until now, thanks to a series of unfortunate circumstances:

  1. As previously mentioned, Chrome looks at images’ EXIF data and re-orients them as necessary
  2. The file browser on my Ubuntu 14.04-LTS machine also auto-corrects for iOS’ sloppy behaviour
  3. Unlike the other parts of my toolchain, WordPress ignores EXIF orientation information when images are uploaded, taking the stance that it’s not interested in automatically modifying users’ images.

So what to do? Well, I could open each of the images in an image editing program like Pinta, apply the necessary rotation and resize the file. On the other hand, that sounds boring and time consuming, and I’d rather figure out how to do the job automatically.

Since we’re modifying images, the go-to tool in our kit will be an amazing suite of image editing tools called ImageMagick. It’s 100% free and open source, runs damned-near anywhere, and can do pretty much anything that you might want to do with an image file.

I’m working on an Ubuntu system, so I’ll install ImageMagick like this:

$ sudo apt-get install imagemagick

If you’re on some other platform, you can read up on how to download the tool here.

Now we just have to string together some command line switches to do what we want. Here’s what I came up with:

$ mogrify -auto-orient -resize 584x438 -strip -quality 85% *.jpg

The command that we’re running is called mogrify, and will modify your images in place, so you’re going to want to cd into a directory that contains a copy of your images before running it.

After the mogrify command, we specify a number of command line switches that change how it behaves:

  • -auto-orient fixes the iOS image orientation problem described above
  • -resize resizes the image to the size provided (specified as maximum width x height in pixels), and respects the source image aspect ratio if it can’t make the image exactly that size
  • -strip removes all EXIF data and other metadata from the image, including timestamps, GPS location data, and information about the device that took the image. It also removes the pesky orientation data that caused Chrome and Safari to automatically correct for iOS’ behaviour, which is important, because we’ve just rotated the image, so if we leave the metadata in place, the image might actually appeared double rotated after I post it
  • -quality specifies the compression level to use when resizing the image (specified as a percentage between 0 and 100)

The last thing in the command, after all of the command line switches, is *.jpg, which tells mogrify to do all of the previous steps on every file in the current directory that ends with .jpg.

Once I’ve run this command, I’m left with a directory full of properly oriented images that are the right size for posting on my website, with all of the private/identifying metadata stripped out of them.

Handy, right?

3 Comments

Filed under Software

Cake Pops!

Well, actually, cake pop stands. My wife Stephanie is the one that makes the cake pops. I just make the things to display them with. This past weekend, our friends Warren and Kaitlin were married, and they asked Stephanie to make some cake pops for their reception. In turn, Stephanie asked me to come up with a classy way to present the cake pops. This is what I came up with:

2016-06-26 12.57.30

There are around 55 cake pops in a batch, and Stephanie planned to make two batches, so I wanted enough space to display 100 treats at once. I settled on five trays, each large enough to hold 20 cake pops. The final dimensions would be 6″ by 7.5″, with a matrix of evenly spaced holes centred 3/4″ from each edge. These dimensions meant that each hole would be 1.5″ from each other hole, which suits the average diameter of a cake pop perfectly.

2016-06-26 12.58.14

I started off with a 1″ x 10″ x 6′ length of clear poplar stock from Home Depot. Because the lumber industry doesn’t understand that numbers have meanings, the actual dimensions of this piece were 3/4″ x 9.25″, which left plenty of stock to cut my five 6″ by 7.5″ rectangles.

2016-06-26 13.04.47

On each piece, I marked out a grid for the holes

2016-06-26 13.44.51-2

Since I don’t yet own a drill press, I took a trip out to my parents’ place to borrow my Dad’s. It was the perfect tool for the job, and allowed me to drill a hole at each intersection that was perfectly perpendicular to the piece, and the correct depth to boot.

2016-06-26 14.37.05

The diameter of each hole is 5/32″, which is just a bit tight for the sucker sticks that Stephanie intended to use for her cake pops. Later on, I’d end up reaming each of the holes out just a bit to ensure that the sticks could slide in and out of the holes with ease. Unfortunately, the next size up in my drill index is 11/64″, which was a bit too loose for this application.

2016-06-26 14.56.06

To add a bit of detail to the face of each stand, I decided to chamfer each hole with a countersink bit. Back in my shop, I used my router to add a 45 degree chamfer to the edges of each tray. They’re simple touches, but in my eye, they add a bit of detail that really cleans the pieces up.

2016-06-26 15.47.22-1

After a good sanding down to 220 grit, I finished the trays with two coats of butcher block oil, sanding to 400 grit in between coats.

2016-06-26 16.26.19

Following the manufacturer’s directions, I let the finish cure for three days to ensure that it was food safe before letting anybody lick it. As mentioned above, I had to bore each hole after finishing the pieces, because the oil caused the grain around each hole to expand a bit.

The pieces were finished in plenty of time for Saturday’s wedding, and even though I forgot to take a picture during the reception (in my defense, the lighting was poor, and well, I’d had more than a few beers), I did take this picture of one posing with the left over cake pops the next morning:

2016-07-03 08.44.06

All in all, this was a really fun project. It only took me about a half day to complete (not including waiting for the finish coats to dry), and I’m really happy with how the trays turned out. They aren’t as tasty as my wife’s cake pops, but they do complement them pretty damned well.

Leave a Comment

Filed under Wood Working